


Draw a Porcupine with only 6 simple tasks! A few creatures look exceptionally charming, and others look scary in a manner that cautions you not to irritate them. You may also learn many things cartoon drawing, scary drawing, cartoon drawing, cute drawing, flowers drawing, cute drawing, how to draw car puppy drawing, and dog drawing.
While most creatures will have one of these qualities, the Porcupine has the one-of-a-kind differentiation of having both. It looks incredibly adorable with its little face and paws, yet you won’t want to contact one because of the mass of sharp spikes on its back. These quills make it scary, yet they make it significantly more challenging to figure out how to draw a porcupine.
Like any drawing challenge, it may be more straightforward when you know what to do, which is what this instructional exercise is for. Our bit-by-bit guide on the most proficient method to attract a porcupine in only 6 stages will show you how fun and simple it may be! the most effective method to attract a porcupine 6 stages
Instructions to draw a porcupine – we should get everything rolling!
Stage 1
instructions to draw a porcupine Stage 1 Before we begin drawing the mass of plumes on the back, we’ll first begin with the head and front legs in this aide on the most proficient method to draw a porcupine. Begin by drawing a slightly adjusted shape with a speck inside for the eye. Then, at that point, utilize adjusted lines for the gag and add hair lines.
We will remove an ear after the eye and, after that, the bottom of the channel. You can draw little front legs with paws at the closures just after the neck. At last, draw long, sharp lines assembled at the highest point of the head. These will be the prominent porcupine plumes, and we’ll keep adding more plumes and things in the accompanying advances.
Stage 2: Move a more significant amount of the back and tummy.
The most effective method to draw a porcupine stage 2 As we referenced in the past piece of your porcupine plan, you will add more plumes to the back to develop it progressively. To add the following part of plumes, we’ll define much more wavy boundaries with sharp focuses at the top.
As displayed in the reference picture, these spikes will get a piece longer as you progress. Whenever you’ve drawn this last segment of plumes, we’ll draw the tummy of the Porcupine. You can draw that shaggy underside by defining rough boundaries behind the front legs. Then, draw the first squat rear legs before planning for stage 3 of the aide.
Stage 3 – Draw the Accompanying Quill Segments
instructions to draw a porcupine Stage 3 This third move toward our how-to draw a porcupine guide will see you add considerably more plumes to the body. Some will go in the back with the others you drew, yet the rest will go aside. We should zero in on those behind to begin. To draw the following area, continue to draw a more significant amount of those new lines you’ve drawn up to this point.
The following stage will require persistence, so you should have some tea! We’ll add a mass of spikes to the side of the body, and these will be drawn with a mix of the sharp lines you drew on top and the wavy lines. They ought to cover the body’s foundation as it shows up in our reference picture, and afterward, we can proceed.
Stage 4 – Next, draw more body feathers
instructions to draw a porcupine Stage 4 You’re genuinely beginning to draw those plumes! In this fourth piece of your porcupine drawing, we’ll add one more part of barbed plumes on top of the past segment you recently drew.
The following segment is the most significant segment you’ve drawn up until this point, and whenever you’re finished, there may be a little unfilled segment on top of the Porcupine to fill. We will manage this last point and the last subtleties in the subsequent stage of the aide.
Stage 5 – Add Last Subtleties to Your Porcupine Drawing
instructions to draw a porcupine Stage 5 This fifth stage of our how-to Remove a Porcupine focus will catch you counting the last subtleties and connections to complete it before the final grade. As we referenced in the past step, this will primarily include filling the vacant region over different quills. Fill in this spot precisely as you have done in the remainder of the drawing, and your Porcupine is prepared for some tone.Before continuing with this step, likewise, try to add all the d
Stage 6 – Polish off your porcupine drawing with Variety
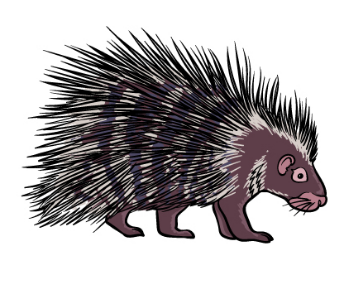
Instructions to draw a Porcupine stage 6: You’re prepared to polish off this drawing for certain varieties! We used an experimental variety plot for our model picture, as we mainly used a few browns with white stripes on the plumes. If you want to go for a close look, you should utilize some watercolor paints, as you will want to cover up your defined boundaries despite everything you see them. This is only one methodology you can take, yet there are various ways to Variety this image! What tones and mediums could best suit this astounding porcupine?
5 Hints To Make Your Porcupine Drawing Far Superior!
These tips for your porcupine sketch will assist with making it shockingly better! This drawing of a porcupine was an enjoyable test, and since you have finished it, you could add significantly more porcupines to the picture. You could add one, two, or significantly more porcupines to the image to ensure this one has a lot of companions! You would finish the aide once more and perhaps change a few subtleties.
What number of porcupines might you want to add?
If you’ve had enough of drawing porcupines, you could add different creatures to the picture too. This would be an incredible opportunity to flaunt some of your #1 creatures! They could be vertebrates, reptiles, birds, or anything else. Any creatures you add will make this image much more fascinating to check out! If you’ve generally longed to gather a porcupine or perhaps have a decent memory of when it worked out, then, at that point, you could add yourself to this porcupine drawing.
This would be an extraordinary method for making this portrayal more private, and you could attract yourself to any style you like. Or, on the other hand, you might like to draw another person in the picture! Porcupines are fascinating creatures, and you could add an instructive component to your image by writing in certain realities and measurements about porcupines around the one you drew. You could look into any pieces online that you view as fascinating, or you might have a most loved reality all set! What are a few cool things about porcupines that you could incorporate?
Drawing a foundation set is another approach to filling your porcupine sketch’s foundation. You could do this in a couple of ways: to show the porcupine right at home. Or on the other hand, you could show it in a zoo or a house for a tomfoolery wind. There are countless tomfoolery foundations for you to pick and explore different avenues!
Your Porcupine Drawing is Finished!
That reminds us of this aide of the best way to draw a porcupine! This was a misleading, precarious attraction, as there were heaps of little plumes to attract a persuading way. However long you follow the means and draw them segment by area, you should have no issues drawing these little subtleties! Then, at that point, you can unwind and have a great time polishing off with your own extra subtleties, components, and Variety decisions!
When you’re prepared to take on another drawing, you can visit our site to participate in our massive drawing guide library. We transfer new aides frequently, so continue to look for considerably more! We additionally trust that you will share your completed porcupine drawing on our Facebook and Pinterest pages so we can perceive how incredible your excellent craftsmanship looks!