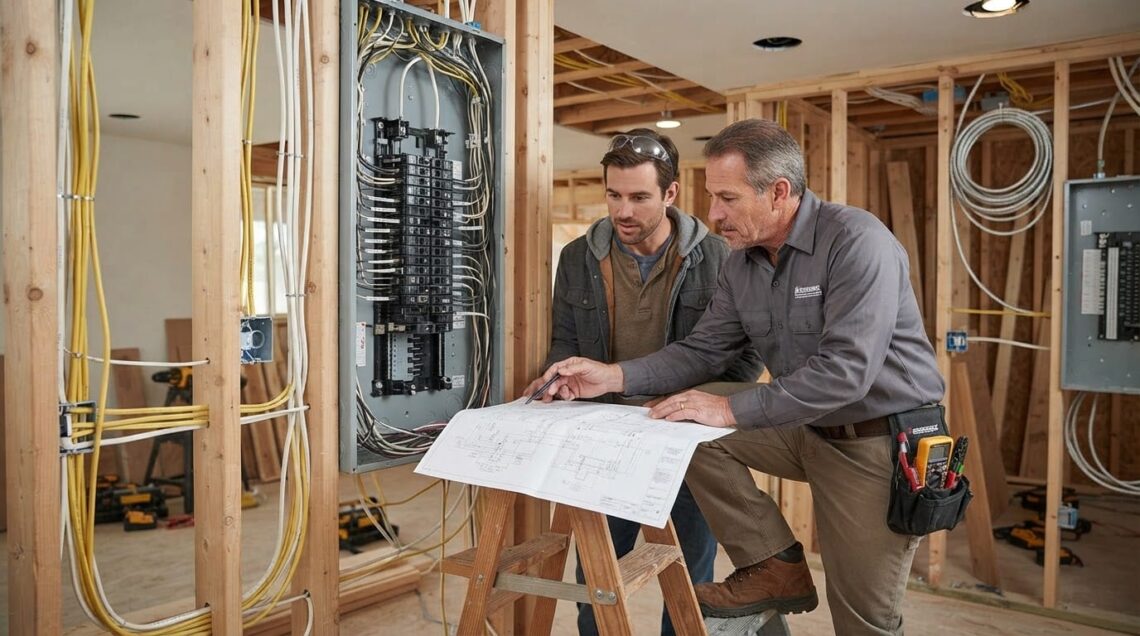
Most homeowners think about electrical work in terms of what they will see: a kitchen island with pendant lights, a bathroom fan that actually clears the air, an outlet where the television can finally go. The wiring behind those choices is governed by an older question: how much current the house can deliver safely, and where it needs to go. A well-run installation starts there, and the sequence that follows, from permits to testing to paperwork, determines whether the work holds up for decades.
Homeowners comparing residential electrical installation services often focus on hourly rates or how quickly a crew can arrive. A more useful comparison is how a contractor approaches the house as a system. A capable provider will look at the service entrance, the panel, the grounding electrode system, and the loads planned for the next decade before quoting fixtures. That order of operations separates a planned installation from a series of unrelated repairs.
When evaluating providers, ask for a written scope that lists conductor sizes, breaker types, box locations, and required permits. Before signing with any firm, including zimmermanelectricindy, confirm the state electrical license, verify liability insurance and workers’ compensation coverage, and ask who pulls the permits. These questions take little time and reveal how the work will be managed.
Start With the Home’s Actual Electrical Demand
Every installation begins at the service entrance. Many homes built before the 1970s in Indianapolis neighborhoods have 60- or 100-ampere service, while newer homes commonly run 150 to 200 amperes. The load calculation method in NEC Article 220 determines whether that capacity is adequate. It does not simply add every connected appliance at full nameplate value. Instead, it applies demand factors: general lighting is calculated at 3 volt-amperes per square foot, each small-appliance branch circuit at 1,500 VA, and the laundry circuit at 1,500 VA.
Modern loads change this picture quickly. A Level 2 EV charger typically requires a dedicated 240-volt, 40- to 50-ampere circuit. A heat pump with electric backup strips, an induction range, and a home office with space heating can each add significant demand. In older houses, these additions often push the panel past its practical limits, even when the existing breakers appear to have room.
A plan should start with a load assessment rather than a fixture list when the home has a 100-ampere or smaller service, the panel has few open spaces, lights dim when large appliances start, or the homeowner plans to add two or more major electric loads.
Where Residential Installs Commonly Go Wrong
Permits and inspections are the first checkpoint. In Marion County, permits for residential electrical work are handled through the Department of Business and Neighborhood Services, and requirements can differ among municipalities in the surrounding metro area. Unpermitted work can complicate resale because buyers and lenders often request documentation, and insurers may dispute claims tied to wiring that was never inspected.
Several code requirements are frequent sources of error:
- GFCI protection is required in bathrooms, kitchens, garages, outdoors, unfinished basements, and receptacles within 6 feet of a sink (NEC 210.8).
- AFCI protection is required for most 120-volt branch circuits serving habitable rooms (NEC 210.12).
- Grounding and bonding under NEC Article 250 ensures fault current has a low-impedance return path.
- Box fill limits the number of conductors in a box according to NEC 314.16, preventing overheating and damaged insulation.
Real failures usually trace back to a few patterns. Overloaded neutrals appear when shared neutrals on multiwire branch circuits are not properly identified, or when a neutral carries unbalanced current from too many loads. Undersized conductors, such as 14 AWG wire on a 20-ampere circuit, can overheat inside walls long before a breaker trips. Missing bonding at metal water piping, gas lines, or the service equipment can leave people exposed during a fault.
Common Issues in Older Homes
Knob-and-tube wiring, common in homes built before about 1950, lacks an equipment grounding conductor and often has insulation that has degraded over decades. Many insurers now require replacement or inspection before writing coverage. Full replacement typically means opening walls and attics, removing the original runs, and installing modern NM-B cable with proper grounding.
Aluminum branch circuits, widely installed in the mid-1960s through the 1970s, can loosen at terminations and create high-resistance connections. Remediation options include pigtailing with copper using connectors rated for copper-aluminum connections, installing CO/ALR-rated devices, or replacing the circuits entirely. Some older panels from manufacturers such as Federal Pacific and Zinsco have been associated with breaker failure reports, and a licensed inspector should evaluate them.
Partial rewiring makes sense when the main feeders and most branch circuits are sound, and the problem is limited to a kitchen addition or a single failing circuit. A whole-home approach becomes more cost-effective when wiring types are mixed, the panel is obsolete, or multiple rooms require new circuits. Typical costs vary widely by region and house size, but whole-home rewiring often falls between $10,000 and $30,000 or more.
Renovation Wiring Versus New-Construction Rough-In
In existing homes, cable routing is the central challenge. Fishing cable through finished walls requires access openings at top plates or through outlets, fish tapes, and patching afterward. It is the least visible option but usually the most disruptive. Surface raceways offer a faster, lower-cost path, with visible runs that can be painted or placed along baseboards and cabinetry. Attic and crawlspace routing is often the most efficient for ceiling fixtures and upstairs outlets. Cable must be protected where it passes within 1¼ inches of a framing member’s edge, typically with steel nail plates, and fire-stopping is required where cables pass through rated assemblies.
New construction offers a different sequence. Electrical rough-in happens after framing and before insulation and drywall. Electricians coordinate box placement with HVAC ducts, plumbing drains, and structural members, and changes are far cheaper before walls close. Rough-in inspection confirms box locations, cable support, and grounding before the next trades arrive.
Sequencing decisions in renovations affect both cost and disruption. Drywall access determines how much finish work follows the electrical. Relocating a ceiling fixture usually requires attic access or routing through joists, while moving a switch may be simple if the wall cavity is open and complicated if it is not. Asking early where each fixture and access point will sit can prevent expensive rework.
Equipment and Layout Choices That Affect Daily Use
Panel choices affect both safety and convenience. Breakers are not interchangeable across brands, and listed combinations matter. Installing the wrong breaker can void the panel’s listing and create a fire hazard. A subpanel is often the right solution when the main panel has available capacity but lacks open spaces for a new circuit cluster, such as a garage workshop or an addition. A full panel replacement becomes worth considering when the existing panel is obsolete, the service amperage is insufficient, or the home needs a meaningful increase in capacity. Subpanels commonly cost between $800 and $2,000 installed, while a 200-ampere service upgrade with a new panel can range from roughly $2,500 to $5,000, depending on utility coordination and site conditions.
Dedicated circuits are essential where loads are high or failures are costly. Kitchens require at least two 20-ampere small-appliance circuits (NEC 210.52(B)). Laundry rooms need a dedicated 20-ampere circuit (210.11(C)(2)), and bathrooms require at least one 20-ampere circuit (210.11(C)(3)). Workshops benefit from separate 120-volt circuits for lighting and tools, plus a 240-volt circuit for larger equipment.
Usability decisions matter as much as code compliance. Smart switches often require a neutral conductor in the switch box, so planning those wires before drywall saves retrofit work. Outlet placement should follow the 6-foot spacing rule in NEC 210.52(A) and consider where furniture and televisions will actually sit. Surge protection works best in layers: a whole-home surge protective device at the panel, listed to UL 1449, combined with point-of-use protection for sensitive electronics.
Testing, Documentation, and Keeping the System Healthy
Post-installation testing verifies that the work performs as designed. Electricians typically check polarity at receptacles, ground continuity and loop impedance, and GFCI and AFCI function by confirming each device trips when its test button is pressed. A receptacle analyzer can identify open grounds, reversed polarity, and open neutrals in seconds. Lug torque is verified against manufacturer specifications, and the final inspection by the local authority having jurisdiction confirms the installation matches the permit.
Documentation is a valuable and often overlooked deliverable. A labeled panel directory should identify each breaker by room and load, and as-built notes should record cable routes, box locations, and any concealed changes. Photographs taken before drywall closes preserve information that becomes difficult to recover later. Keep permit records and inspection approvals together, since they support future renovations, resale disclosures, and insurance applications.
Ongoing maintenance catches problems early. Homeowners should contact a licensed electrician promptly if they notice warm outlets or switches, breakers that trip repeatedly, lights that flicker when appliances start, buzzing from the panel, discolored cover plates, or a burning odor. These symptoms often indicate loose terminations, overloaded circuits, or failing devices, and they are easier and less expensive to address before a fault becomes a fire.


